
Here is a tutorial for creating a simple sticker with a folded edge. I originally posted it a few years back on my personal blog.
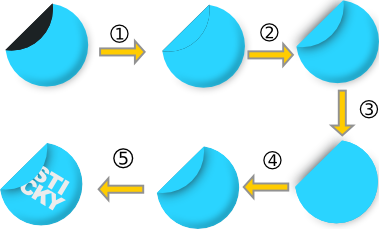
This is what we are aiming for:

Phase One:
1. Draw a circle with the circle tool.
2. Using the path tool, draw a shape that intersects the circle for your “dogear”
3. Select the path and the circle and use Path>Cut Path.
And set the colours of both the paths that result from this.

Phase Two:
1. Select the “Dogear” (mine is black) and press flip vertical.
2. Then press flip horizontal.

Phase Three:
1. Select the main body of the sticker (mine is blue)
RightClick > Duplicate, then change the colour. (mine is pink)
2. Do it again and change the colour to something different again. (mine is green)
3. Select the green one, and use the arrow keys to offset it a bit.
4. Then select both the green and pink objects and choose Path>Difference
5. Change the colour of the remaining path to black.
6. Open the stroke/fill dialog and play with transparency & blur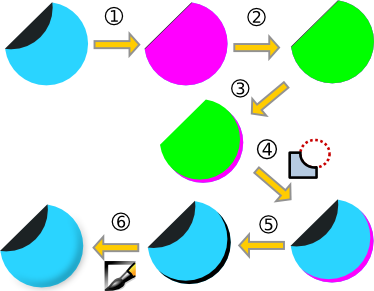
Phase Four:
1. Duplicate the black “Dogear” object, and change the colour.
2. Select the black one (underneath) and play with the blur and transparency.
3. Duplicate the body of the sticker again.
4. Press CTRL+A to select all, then choose Object>Clip>Set
5. Add your text, and you are done!

really nice and easy tut!
LikeLike
Coooool, thanks verymuch
LikeLike
That was a great tutorial, thank you!
LikeLike
thanks works great
LikeLike
This post is in fact a pleasant one it assists new web viewers, who are wishing for blogging.
LikeLike
execellent
LikeLike