
One of the most frequently asked questions from Inkscape users is “how do i crop an image or object?”. Inkscape is primarily a vector graphics editor, so when someone asks this question, they could possibly mean something slightly different to a traditional image crop. This FAQ explains a few of the techniques that people actually mean when they say they want to crop in inkscape.
What do you mean when you say “crop”
- If you have a complex drawing with many shapes and objects, and want to trim these, then Clipping is probably the solution for you. (click here to jump to how to do this)
- If you have a single path or object (like a star or a rectangle), and want to trim or crop that object down, then Boolean Operations is probably what you need. (click here to jump to how to do this)
- If you are exporting your inkscape document (SVG) to a bitmap (a PNG) with the “File > Export Bitmap” command, and want to only export a portion of your document, then changing the document size, and just exporting the document is probably the solution for your needs. (click here to jump to how to do this)
Clipping
The Clipping feature is an easy and versatile way to crop vector or bitmap/raster objects in Inkscape.
Basic process for cropping / clipping in Inkscape
The process is pretty simple to clip (crop) a group of objects in Inkscape:
- Select all the objects that you want to clip / crop, and group them together with Object > Group from the menu.
- Draw a shape over the top of the group where you want to clip / crop. This can be any single shape, a rectangle, a circle or even a star. This is our clipping object.
- Finally, select both the group from Step 1, and the clipping object from Step 2, and from the Inkscape menus, choose Object > Clip > Set.
A more detailed walkthrough of clipping
If you are less familiar with Inkscape, here is a more detailed walkthrough tutorial for cropping / clipping in Inkscape. First up, we are going to start with our little monster friend here that was downloaded from the Open Clip Art Library:

Our monster is actually a group of 21 objects (a mixture of Ellipses and Paths). When clipping, it is always easier to group the objects being clipped. Grouping objects is as simple as selecting 2 or more objects and choosing Object > Group.

Choose the Rectangle Tool from the Toolbar, and draw a Rectangle over our poor little monster’s face.

Select both the the monster (the group) and the Grey Rectangle (a rectangle object). After selecting both, Choose Object > Clip > Set from the menu.

…and our monster is now cropped in a nice neat rectangle.

But what has happened to the rest of the monster? Well, one of the awesome things about the Clipping feature in Inkscape is that it is non-destructive. We can remove the clip at any time by selecting the clipped object, and then choosing Object > Clip > Release from the menu.

…and now our monster is back to normal! Well, the rectangle that was clipping him before is still there, but trust me, so is the monster.

But can you crop your image with something other than a rectangle? Yes! Clipping in inkscape can be done with a wide range of clipping objects, including Text Objects…

Circle and Ellipse objects…

and Stars and Polygons.

Even a path can be used as a clipping object.

In fact, if you use a path as the clipping object, you can actually edit the clip path without having to Release it. First select the clipped object, then choose the Node Editing Tool. Your clip path will be outlined Green, with the normal path editing nodes visible.

Now, you can edit this path, and change the area that is clipped / cropped.

Clipping is one feature in inkscape that you will use time and time again. When working with imported bitmap / raster images, clipping is a easy way to crop without having to open up the GIMP. Additonally, when combined with blur, you can achieve some awesome effects like simple bubbles.

Boolean Operations
If you have a single path or object (like a star or a rectangle), and want to trim or crop that object down, then Boolean Operations is probably what you need. In Inkscape, you can use Boolean Operations to “crop” vector objects. This method works best if you have a single vector object that you want to trim. Note also, that unlike Clipping, this operation is destructive, you are deleting data from your SVG. This just covers one boolean operation (intersection) to achieve a basic “crop”. There are many other boolean ops in inkscape too.
Take the following landscape lineart that was vectorised with Inkscape: 
It is a single filled-in path with no stroke:
 To “Crop” this object, simply draw a rectangle over it, select both the rectangle and the landscape beneath:
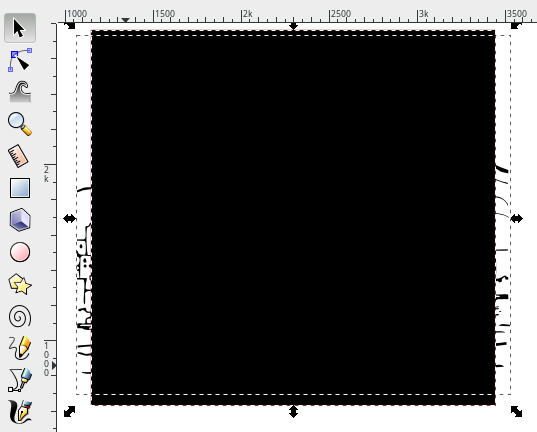 And choose Path > Intersection from the menu. Your landscape should now be cropped:
 Additionally, you can “Crop” vectors into shapes other than rectangles, for example, draw a shape:
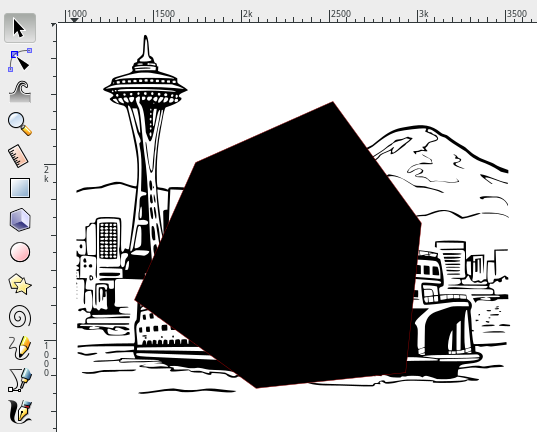 Then choose Path> Intersection:
Changing the Document size
If you are exporting your inkscape document (SVG) to a bitmap (a PNG) with the “File > Export Bitmap” command, and want to only export a portion of your document, then changing the document size, and just exporting the document is probably the solution for your needs.
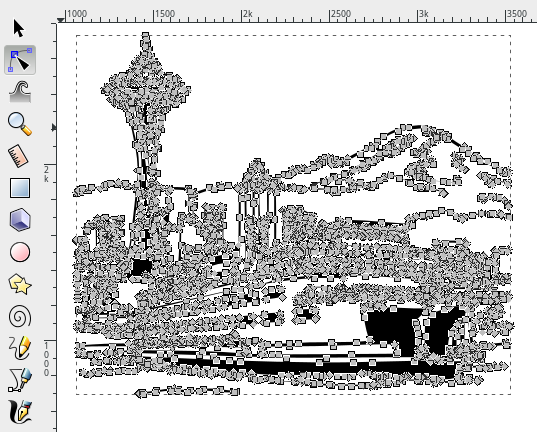
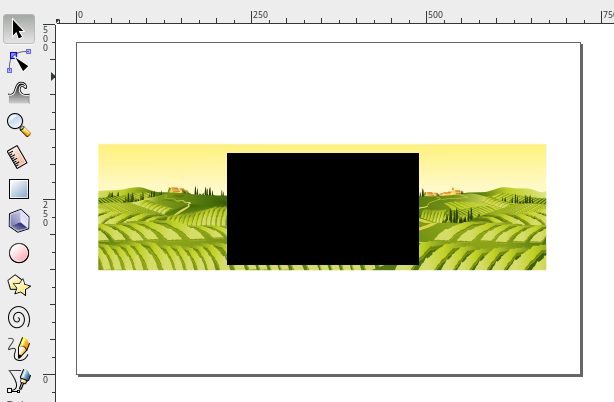
Consider we have the following landscape drawn in inkscape. Note that the black box around the landscape is the document boundary. 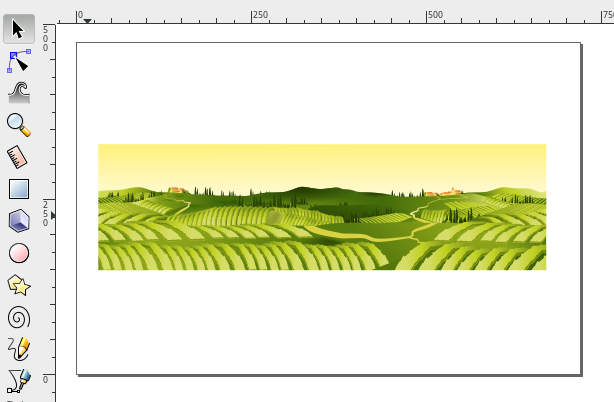
If we were to go File > Export Bitmap (changed to File > Export PNG in newer versions of inkscape), and Set the export area to Page, we would get something like this:
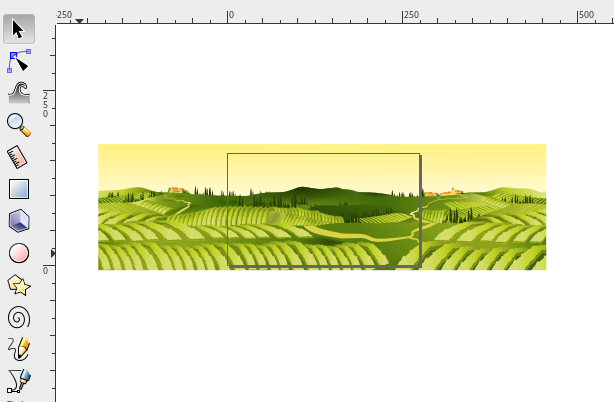
To change the Document Boundary to a better size, and “Crop” our output, first draw a rectangle over where you want to “crop” the document to.
 Then, select the black box, and go to File > Document Properties, and choose “Resize Page to Drawing or Selection”. The Page boundary should resize to the size of the box. Note that you may need to check the box “Border on top of drawing” to see the page boundary. Also delete the black box.
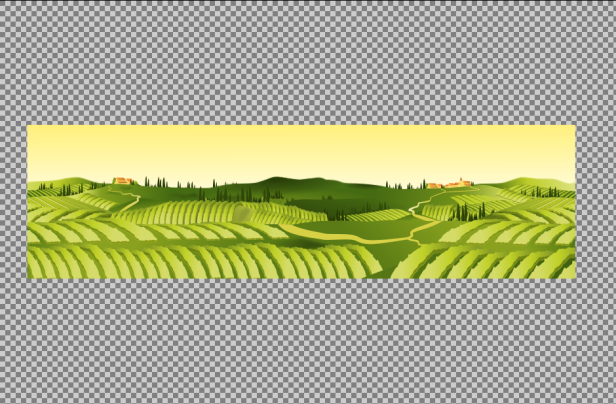
 Now, when you use File > Export Bitmap (changed to File > Export PNG in newer versions of inkscape), and Set the export area to Page, your output should be a “cropped” version of our entire document:


what happens to the before part ? I would not like to discard it and would like to use it after the clip has been done.
LikeLike
never mind, I used Path > Difference.. that did the kind of clip I wanted. 🙂
LikeLike
What fun is this! Thanks for sharing…I could play with this for hours.
LikeLike
It doesn’t work. Nothing happens when I set.
LikeLike
Hi david,
Is your clipping path a path?
LikeLike
You have to select both items.
LikeLike
This feature is great but not strictly better than a true crop, especially when exporting to different programs that interpret xml data differently. Inkscape desperately needs true cropping functionality.
LikeLike
Inkscape is primarily a vector graphics editor, so “cropping” in the traditional sense of cropping a photo does not really apply.
Clipping in inkscape is the closest you are going to get to a crop. If you are using paths, maybe a boolean operation is what you are after.
LikeLiked by 2 people
When clipping, I find it very helpful to make the clipping path (in your case the gray shape) *transparent*. So that I can adjust it, while seeing what’s underneat it, before actually do the clipping.
LikeLike
Thanks a lot. Forgot about this crop trick as I had not used Inkscape that much the last couple of months. Not that much in general, but that is changing.. Awesome!
LikeLiked by 1 person
This post did not explain how to crop by changing the document size without exporting a bitmap.
LikeLike
Actually he did, it’s the same process whether you’re exporting or not.
With a rectangular selection active, open the Document Properties dialog (Ctrl-Shift-D) and on the Page tab in the Custom size panel there’s an expandable option to “Resize page to content”.
Expand this and click the “Resize page to drawing or selection” button.
Your document will be cropped to the size of your selection.
LikeLike
There is a fourth method, a variation of your third method: You can export a png without changing the document size. In your third method, select the rectangle that will define the “cropping” area, optionally move it to a separate layer called Export, set the rectangle’s transparency to 0 (or simply hide the Export layer) – now, *while this rectangle is still selected* (even if it is hidden), go to File > Export PNG – Choose *Selection* (instead of Page), set the name, and export the image.
In this manner, you can define several export rectangles (and even export them all at once with Batch export selection). I use this method when designing web pages, exporting parts to be included in a html web page.
LikeLike
Thank you so much..
LikeLike
Editing the clip path doesn’t work for me: http://superuser.com/questions/788422/how-to-edit-clip-path
LikeLike
thanks for your help. not sure why inkscape is so hard for me to learn….used photoshop and illustrator for years (photoshop mush more) but for some reason inkscape feels to me like I am in someone else’s kitchen and I cannot find the knives.
teando.com
LikeLiked by 1 person
Brilliant! Solved my problem. Thanks
LikeLike
Doesn’t work, perhaps it’s because I use the Linux version?
LikeLike
Thank you for this very helpful 🙂
LikeLike
Lovely..very easy..!
LikeLike
Thanks. Enjoyed it. I was really struggling to clip in inkscape. You made it simpler and enjoyable.
LikeLike
Very Helpful, Thanks!
LikeLike
Thank you for your precious help !!
LikeLike
Thanks a lot 😀
LikeLike
Thank you so muchhhh!!!!!!! finally a tutorial thats says ”select both” for crop.. i was about to lose my mind hahaha 🙂 merciiiiiI! gracias !
LikeLiked by 1 person
Thanks for this. I’ve been trying to make custom shapes in Inkscape and bring them as vector shapes into Paintshop Pro 8. The crop document size method here in conjunction with saving as an .emf works brilliantly for me. I love both programs so this is great for me.
LikeLike
HELPFUL. THANKS
LikeLike
doesn’t work at all… I’m well confused.
LikeLike
The best tutorial web page should be like this, very artistic.
最佳的教程网页就应该是这样的,非常艺术性。
LikeLike
Hay,
How could I say only marvelous? You deserve more than that.
It helps me a great deal your post.
Keep posting regularly. BTW, I got your post from googel search engine.
LikeLike
Thanks for helping me to see things in a difrefent light.
LikeLike
I’ve read a few excellent products the following. Definitely price bomkoarking regarding revisiting. My partner and i wonder just how a lot attempt you place to be able to create this sort of fantastic useful website.
LikeLike
That’s an inguinoes way of thinking about it.
LikeLike
Back in school, I’m doing so much learning.
LikeLike
Der er så meget knald på i Skagen her i uge 29, det er ikke unormalt at holde i kø i over en time bare for at komme til Skagen!! Og så som du selv skriver, så ligner folk hinanden i farvede shorts og hyttesko Jeg holder mig fra byen hele ugen, det er helt sikkert
LikeLike
che ridere la storia della sfera :Dche, oltretutto, è un lens flare talmente banale da non richiedere neanche una seconda occhiataè pieno di "esperti fotografi" che nascono con le compatte digitali a quanto pare 😀
LikeLike
Hi John, when I heard about the earthquake I thought of you and am now glad to read you were out of harm’s way.btw, I especially found the second section of this post to be very touching and enlightening.
LikeLike
Yay, I was a winner. But really all this stuff is awesome and I pretty much want to win it all. I wish I could come shopping at Grand Central Station.
LikeLike
I did it and it was pretty easy.
Thank you so much.
The example was perfect haha
Regards!
LikeLike
Hello blogger, i must say you have very interesting content
here. Your website can go viral. You need initial traffic only.
How to get it? Search for; Mertiso’s tips go viral
LikeLike
I have noticed you don’t monetize your website, don’t waste your traffic, you can earn extra bucks
every month because you’ve got hi quality content.
If you want to know how to make extra bucks, search for:
best adsense alternative Dracko’s tricks
LikeLike
I really like this monster, is there a tutorial on how to draw it?
LikeLike
i am facing a challenge. i want to use a picture of a boy for my banner. the boy has messy hair, i do not want to bezier draw every single strand of his hair, so i just cut a nice circular shape of his head. but the it looked very fake on the banner. he looked like he had lego hair. i want to crop his hair exactly as it was – messy. is there a way without having to painstakingly bezier draw every strand of hair?
LikeLike
You want to select the hair, or probably more easily select the background, with an alpha-blended feathered edge, then delete the background. When you paste the boy onto the banner, the stray pixels around the hair will blend into the new background. Such a selection is the forte of an image manipulation program like GIMP or Photoshop, so I would do the work there, save the boy as an image with a transparent background, and import that image into Inkscape. Read some more tutorials, and attempt a quick and dirty version before spending a lot of time tweaking the selection.
LikeLike
Hi! Thanks for the video, nice content, but I didn’t found the answer here. Still don’t know how to cut shapes in other shapes. eg. how to cut out circle inside rectangle. If you can and have time please help. Cheers.
LikeLike
Hi, great tool but is there a way to select & crop multiple shapes out of 1 picture?
Thanks,
Margriet
LikeLike
Thanks a lot. Your post about very interesting content.
LikeLike
Thanks a lot, I enjoyed. Must say you have interesting content here. It works great.
LikeLike
Hi, thanks for taking out time to write such detailed article/tutorial! You’re the man!!!
LikeLike
This is NOT working for me. I am trying to crop a portion of a PDF file. I did the Object > Set but nothing happens. It works on photos but I can’t get to work with this file. What am I doing wrong???
LikeLike
@hondacarcare1 It worked for me. I opened a PDF page in Inkscape using the Internal Import, draw a gray rectangle, select both, Object > Clip > Set , the PDF clips. Are all the PDF elements in a single group?
LikeLike
thank you, i want to make soem text with background image. cropping the image to looks more cool is what i need
LikeLike
As-salāmu‘alaikum
I thank you for the information.
LikeLike
Inkscape should support cropping inserted raster images. None of the above methods have any effect on raster images.
LikeLike
No terrible, just cant get something to cut down and delete the rest. Tried boolean, tried the others,…… still there.
LikeLike
Does not help. I wnat to crop an image I import befor working on it. I dont need the extra data and what it croped!
LikeLike
If you want to edit pixels, use a pixel editor! Besides every photo editor ever, most image viewers let you crop photos, or you can use ImageMagick’s convert, jpegtran, etc.
LikeLike
but the original data is still there. i’m trying to clip an image and then use it in Blender to create a 3d object. when i open the file in an image app it looks like how i want, but when i import to blender, the entire original image is still there.
LikeLike