
In this tutorial, learn how to draw vector ropes in Inkscape using the Pattern on Path path effect with inkscape. This technique is super useful for drawing a whole bunch of different vector assets with inkscape, like rope or laurel wreaths or anything that has a simple shape that is repeated along a path.
Lets get started!
Create the rope element to pattern to repeat
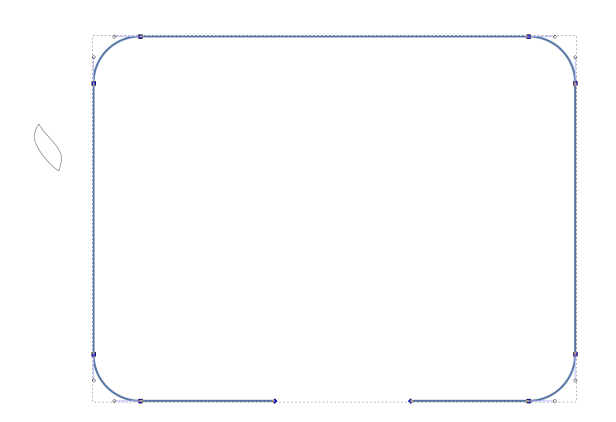
Using the pen tool in inkscape, draw a the shape that will make up the part of our rope that will be repeated. In this tutorial, we are going to call it our pattern.

Create our path to put the pattern on
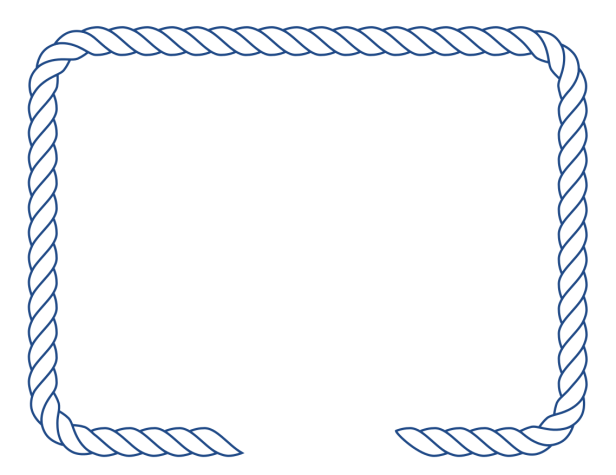
Next, create the shape that you want your rope to be. This can be any shape. In the example image above, the shape i used was a series of paths to form the letters “rope”. But for this example, we just have a simple rounded-cornered frame. In this tutorial we are going to call it our Spine Path.
 Add a path effect to the Spine Path
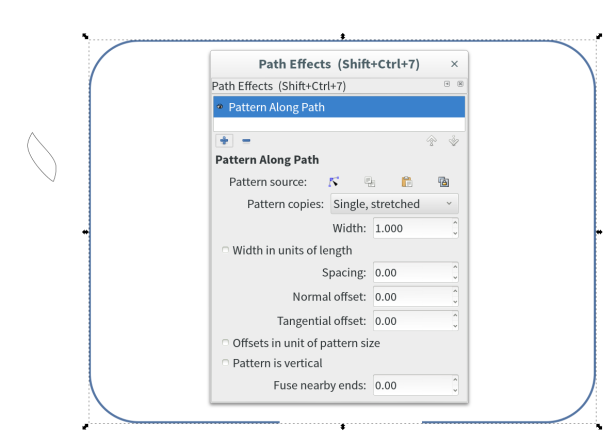
With the Spine Path selected, open up the Path Effects dialog (Path > Path Effects), Click the + button, and choose the Pattern Along Path option from the dialog. It will add the Pattern Along Path effect. Note however that your Spine Path or your Pattern will not change during this step.
Add the Pattern to the Spine Path
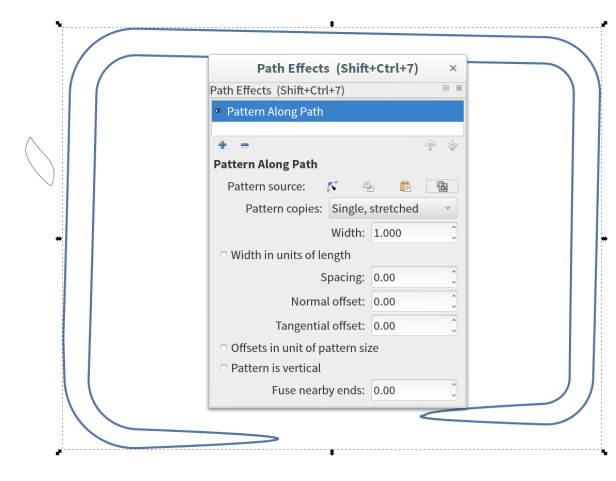
Next, select your Pattern, and copy it to the clipboard with Edit > Copy or Control+C. Once copied to the clipboard, select the Spine Path again, and in the Path Effects dialog, press the Link to Path on Clipboard button (its the last button in the Pattern Source section, with the tiny lock on it).
After doing this, your Spine path should look different — the pattern will be stretched out over the length of the spine path:
Change the Pattern Along Path settings
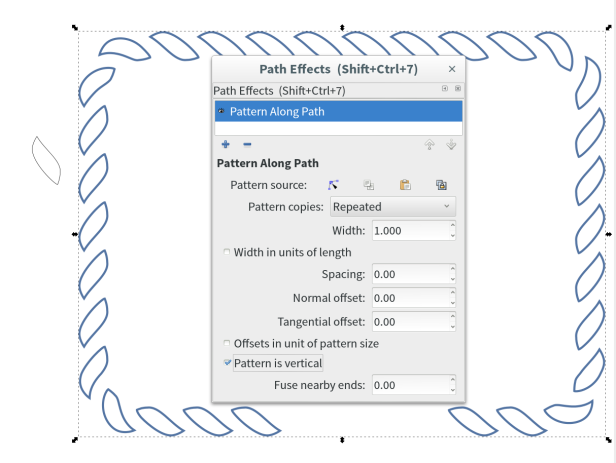
With the Spine Path still selected, change the Pattern Copies dropdown to Repeated, and mark the Pattern is vertical checkbox:
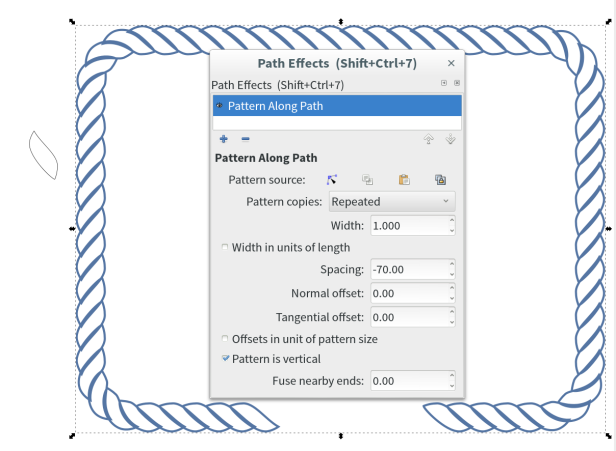
Tweak the spacing
Next, set the Spacing value. This number is going to be a negative number, but will vary widely depending on the size of your image. If a setting of -1 doesn’t change your path much, try a much larger number. Tweak this value until the rope edges line up fairly cleanly:
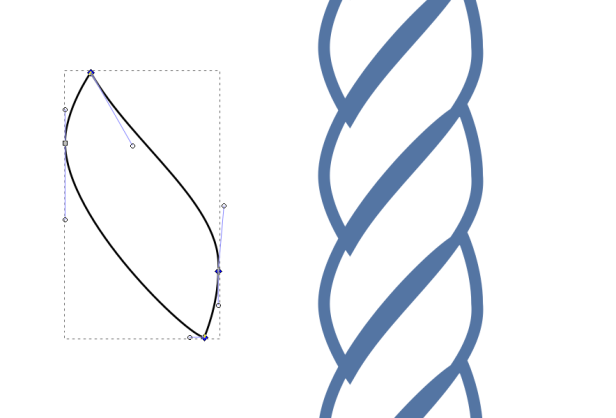
Tweak the pattern to fit better
Now the spacing is pretty close, but when you zoom in on the shapes, they are going to not fit perfectly:
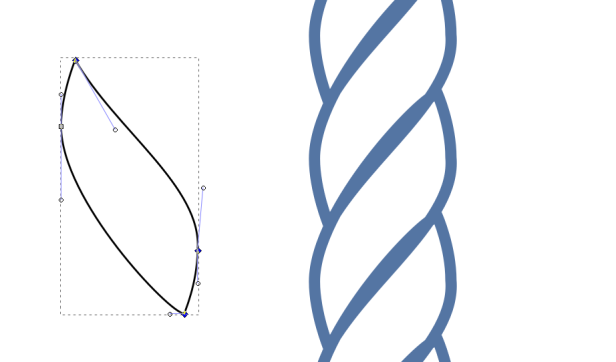
Luckily, we can go back and change the shape of the Pattern. Choose the node tool, and tweak the shape of the Pattern until you have minimal overlaps between the shapes. YOu may also need to tweak the spacing a bit to make it fit better. The key here is that the outside edges line up neatly, don’t worry too much about the inside edges. The result should look something like this:
Tweak the spine path, then Convert to Path, and break apart
Finally, you can select the Spine Path and tweak the shape of it if you want (I didn’t because it was the shape I wanted). Once you are happy with the shape, convert it to a path with Path > Object to Path. Note that once you do this, you can’t tweak the shapes anymore. Finally, break your path into individual shapes with Path > Break Apart, and set the fill colour and stroke to what you want. Once you set the fill colour, the inside overlaps will be covered up.
Experiment!
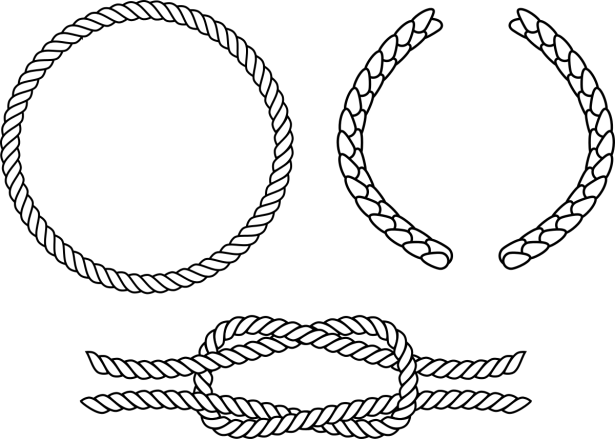
Use this technique with a range of Patterns and Spine Paths to create a range of different results:

Wow !
LikeLike
Awesome!
LikeLike
great tutorial !
LikeLike
Reblogged this on blueMix's blog عبد المؤمن كاظم.
LikeLike
Every time i do this and get to the part where i adjust the spacing value it starts to create a doted line over the rope design. What am i doing wrong? please help
LikeLike
Hi Ryan,
thanks for the great tutorial. It worked well and came out great. I tried to put the rope effect on a text. First I converted the text to path and than added the rope shape. But unfortunately the effect is laying on the outline of the text. So every letter has “two ropes”. Do you have any idea how I can change this to one-rope-appearance per letter?
Thanks,
Maifräulein
LikeLike
Hi Maifräulein,
Did you try converting the text to an object and in lieu of a stroke? I believe that should resolve your problem.
LikeLike
I’m using Inkscape 0.91, at Windows. I didn´t find how convert text into Object.
I really want to put the rope effect on a text, but every letter has “two ropes”. Please, where could I convert text into object, please?
LikeLike
This looked really great when I tried it on non-overlapping lines. Maybe I’m doing something more fundamentally wrong, but where my cursive writing lines overlap, the solid fill doesn’t cover up the repeating shapes on either of the overlapping lines. There is no fill in the areas where they cross, and both outlines are visible. I thought I could just manually delete the paths representing the “underneath” part, but it seems the entire line is stored as one path, and I can’t figure out how to separate it out…
LikeLike
Ok, so I figured out why the fill isn’t there, which I corrected, but I still have the overlapping lines. Maybe I should make each path end in the original line where it would overlap, then do the exercise separately for each path, and try to get it to match up?
LikeLike
HI Lindsay, Did you ever figure out how to remove overlapping lines? I’ve been tinkering, but still haven’t discovered how. Great tutorial though!
LikeLike
Really nice tutorial! It shows how easy patterns make up an great vector! 🙂
LikeLike
This is fun! Thanks 😄
LikeLike
Thanks Ryan,
This is brilliant, particularly the bit about how to edit the pattern once youhave made it. (Sometimes it’s not possible to get exactly the effect you want using the spacing, offsets and tweaking the path and the motif.)
I was looking all over for how to do this and it didn’t occur to me to convert the pattern to a path because I assumed it already was one!
Best wishes, Vic.
LikeLike
It was a nice tutorial, thank you.
LikeLike
Still very relevant
LikeLike
What font did you use for the Rope text above?
Great tutorial, thank you for your expertise!!
Jim
LikeLike